Have you ever looked at a candle and wondered what’s truly going on inside it – how fast it formed, how much effort it took, and which side really pushed harder?
That’s exactly what OmniSpectrum Scan is designed for.
The word “Omni” means all-around, complete, or total. True to its name, OmniSpectrum Scan studies every aspect of a candle, helping you understand what each one is truly saying – not just what the price shows on the surface.
What OmniSpectrum Scan does
OmniSpectrum Scan automatically scans a chosen number of candles (for example, the last N candles) and identifies which candle shows extreme values across different categories.
It highlights the candle with:
- Formation time (Fastest / Slowest)
- Bar body size (Largest / Smallest)
- Bar spread (Largest / Smallest)
- Total volume (Highest / Lowest)
- Buy volume (Highest / Lowest)
- Sell volume (Highest / Lowest)
- Positive volume delta (Strongest / Weakest)
- Negative volume delta (Strongest / Weakest)
That’s a total of 16 key data points. You can choose which ones to display on your chart, depending on what kind of analysis you want to perform.
Build your own logic – your market, your way
Every trader looks at the market a little differently. The indicator lets you define your own Buy and Sell signal conditions – almost like building your personal mini-strategy without writing any code.
You’ll find 2 separate condition sets:
- Buy conditions
- Sell conditions
_1762856180675.png)
For each set, you can choose which candle extremes should trigger a signal. For example:
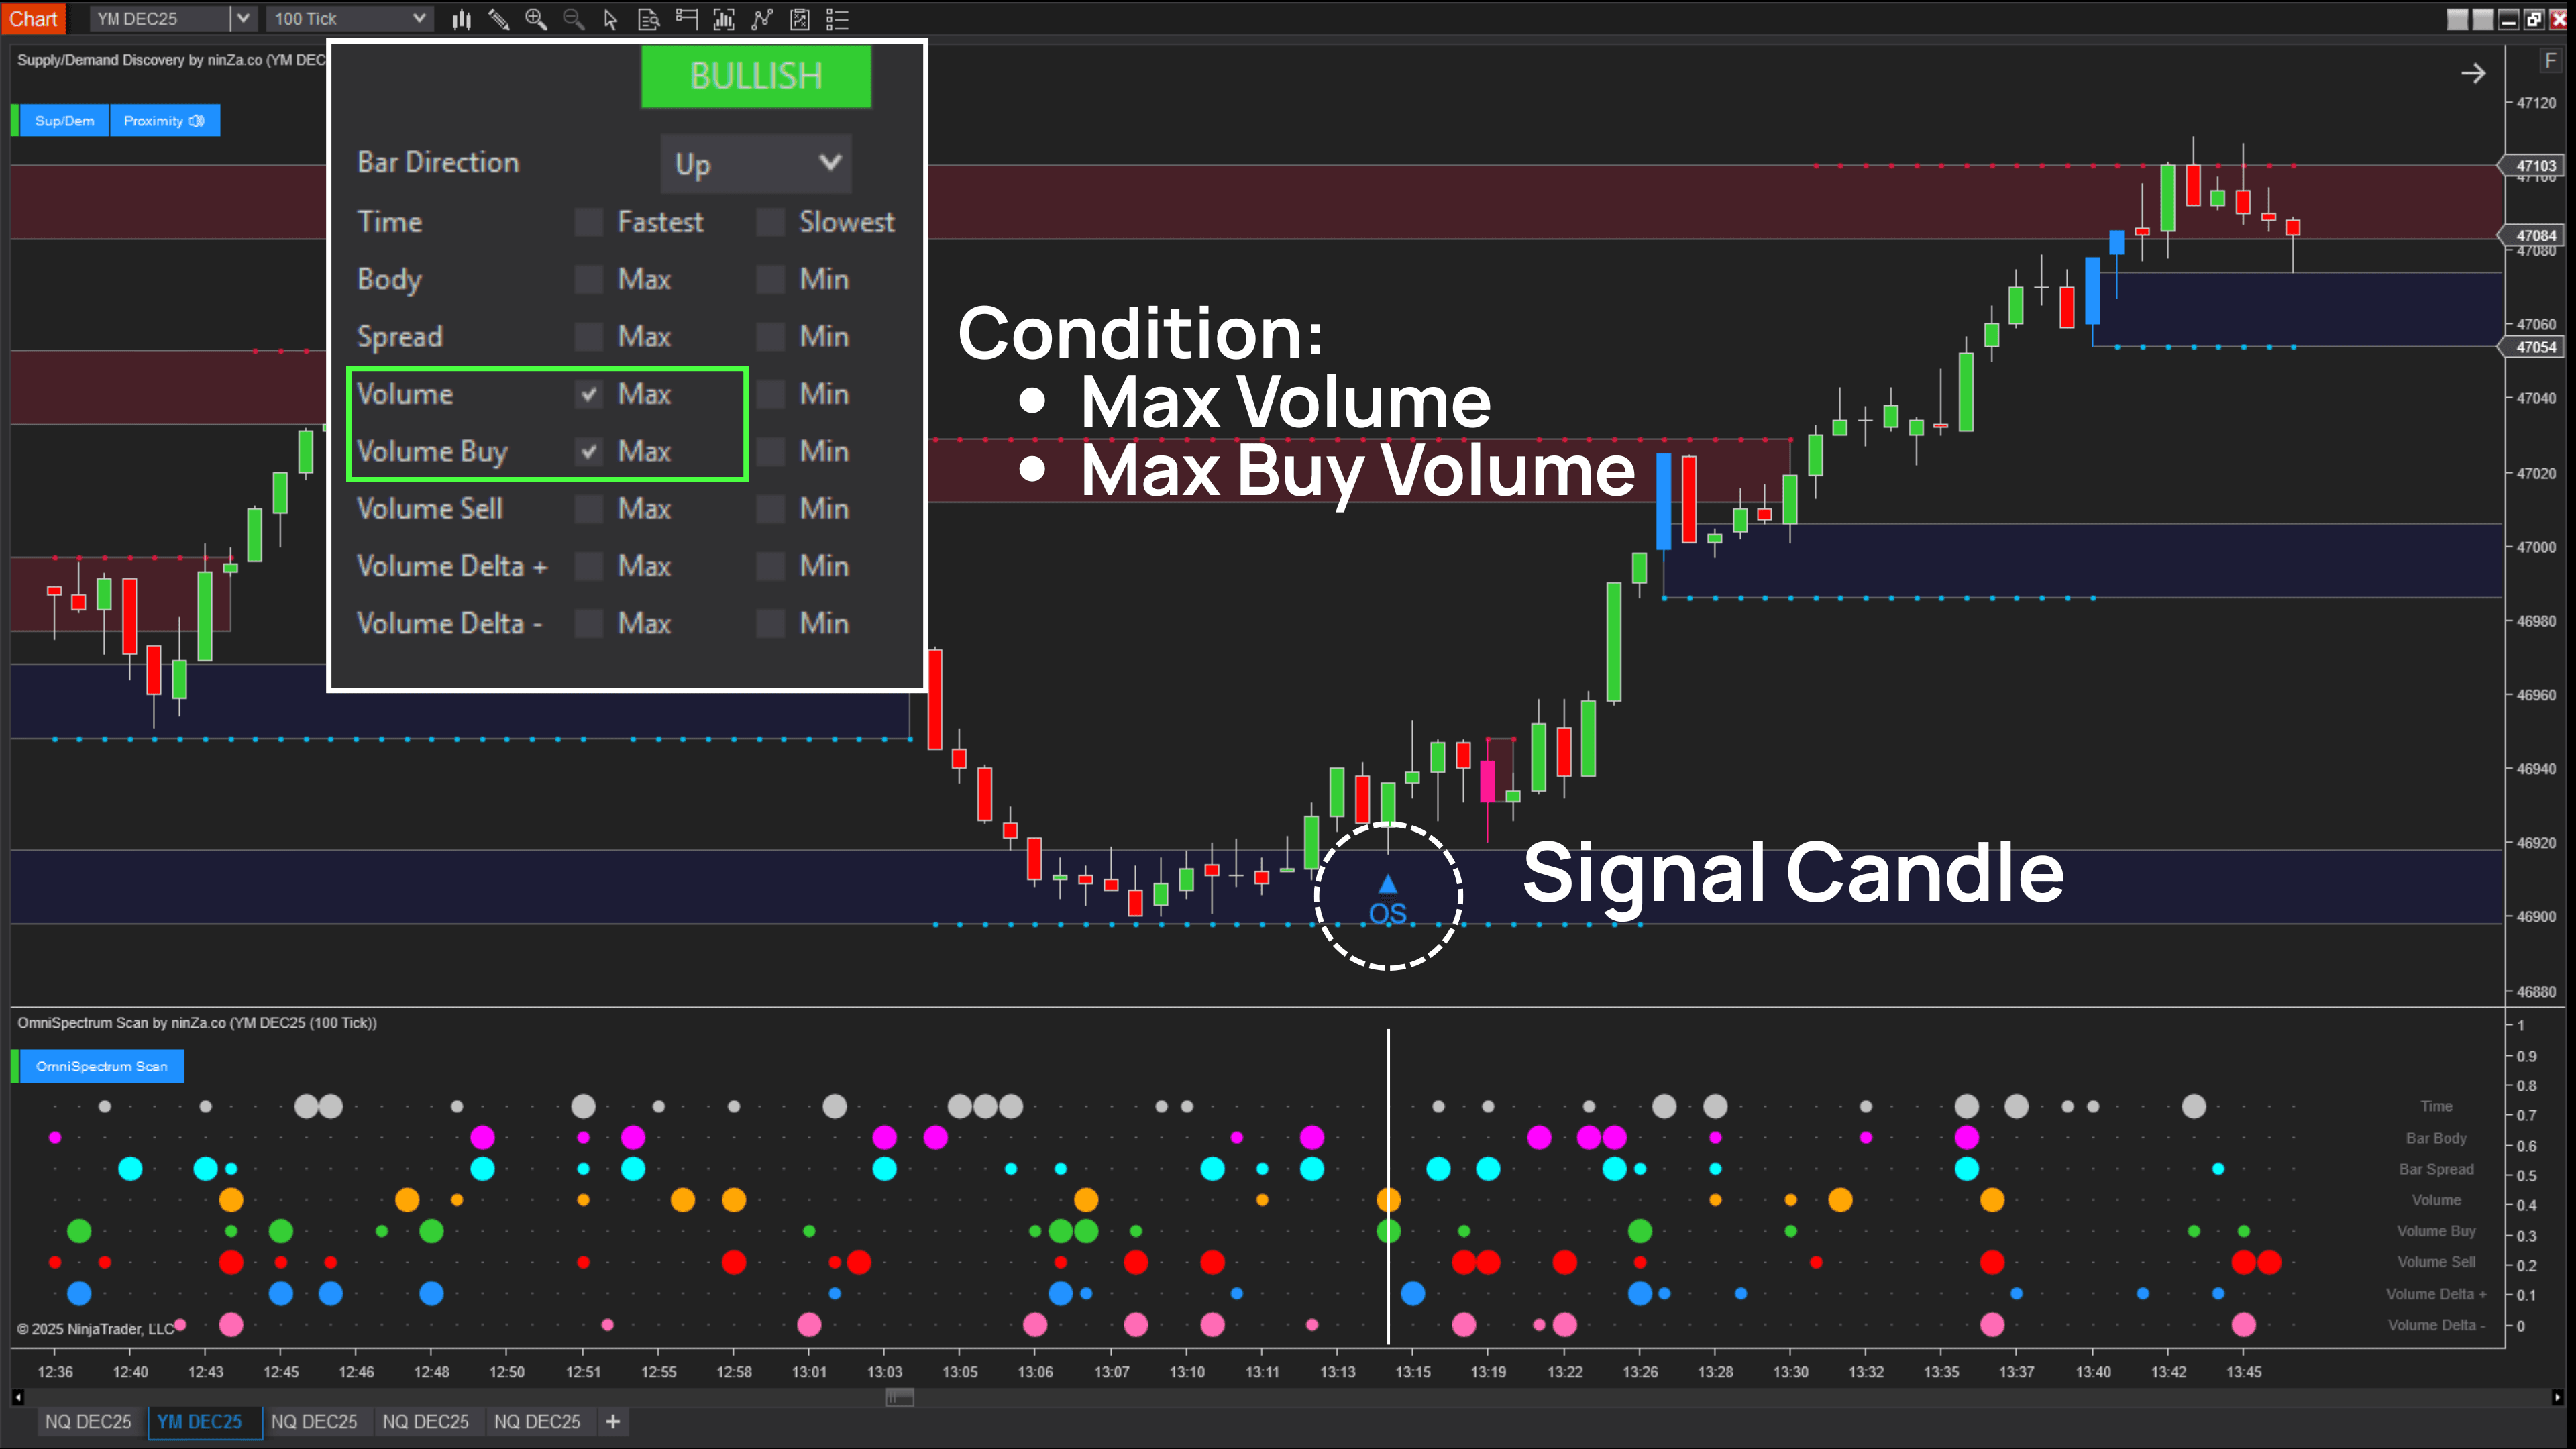
This way, your chart only shows signals that meet your own logic – not someone else’s fixed template.
How each measure helps your analysis
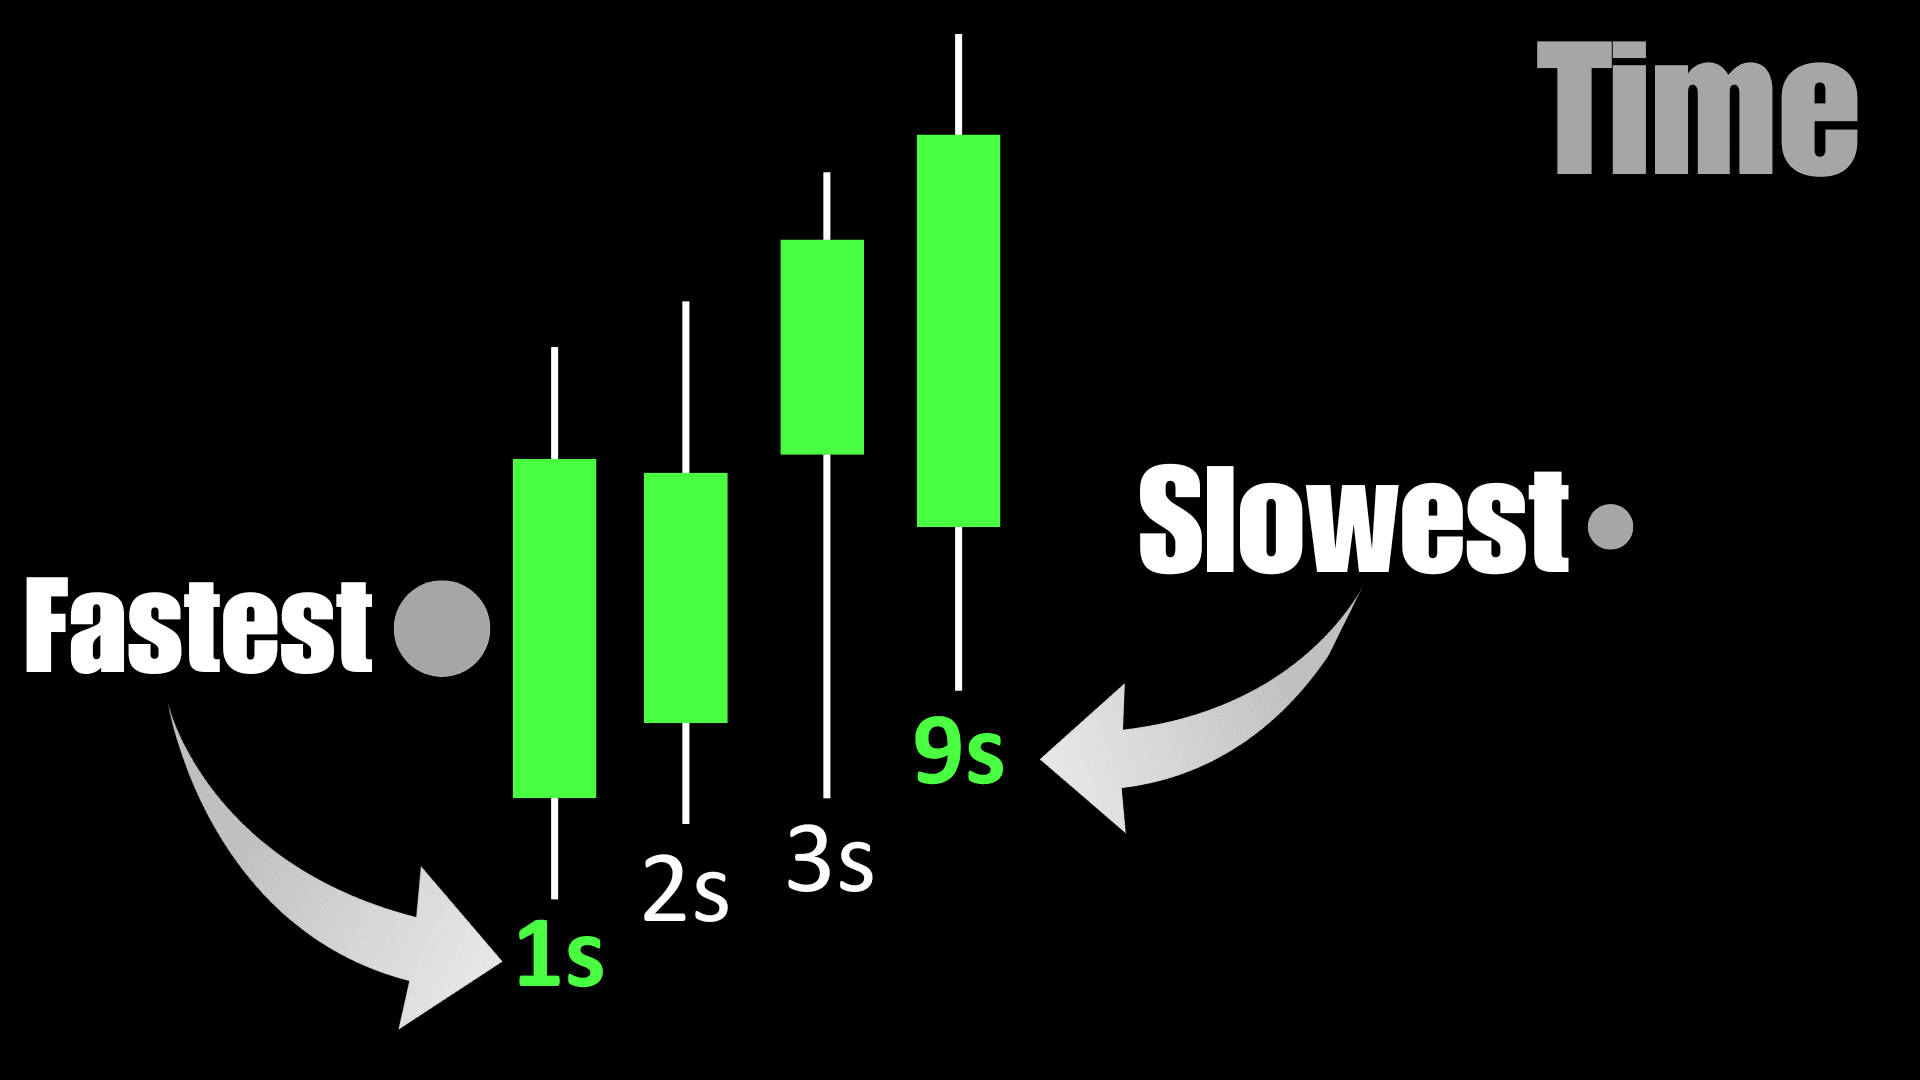
1. Candle Formation Speed (Fastest / Slowest)
When trading with volatility-based bar types such as Tick, Range, Volume, or Renko, how quickly a candle forms often reflects market conditions like momentum, breakout, imbalance, absorption, or distribution.
- Fastest candle: Shows concentrated order flow and strong market engagement –liquidity is being absorbed or depleted quickly.
- Slowest candle: Shows a slower trading pace or balance between buyers and sellers –often linked to absorption or resting zones.
Example use:
- Fast candle + strong delta + high volume = Momentum bar (aggressive flow)
- Slow candle + balanced delta + high volume = Absorption bar (large player absorbing orders)
2. Candle Body Size (Open–Close Distance)
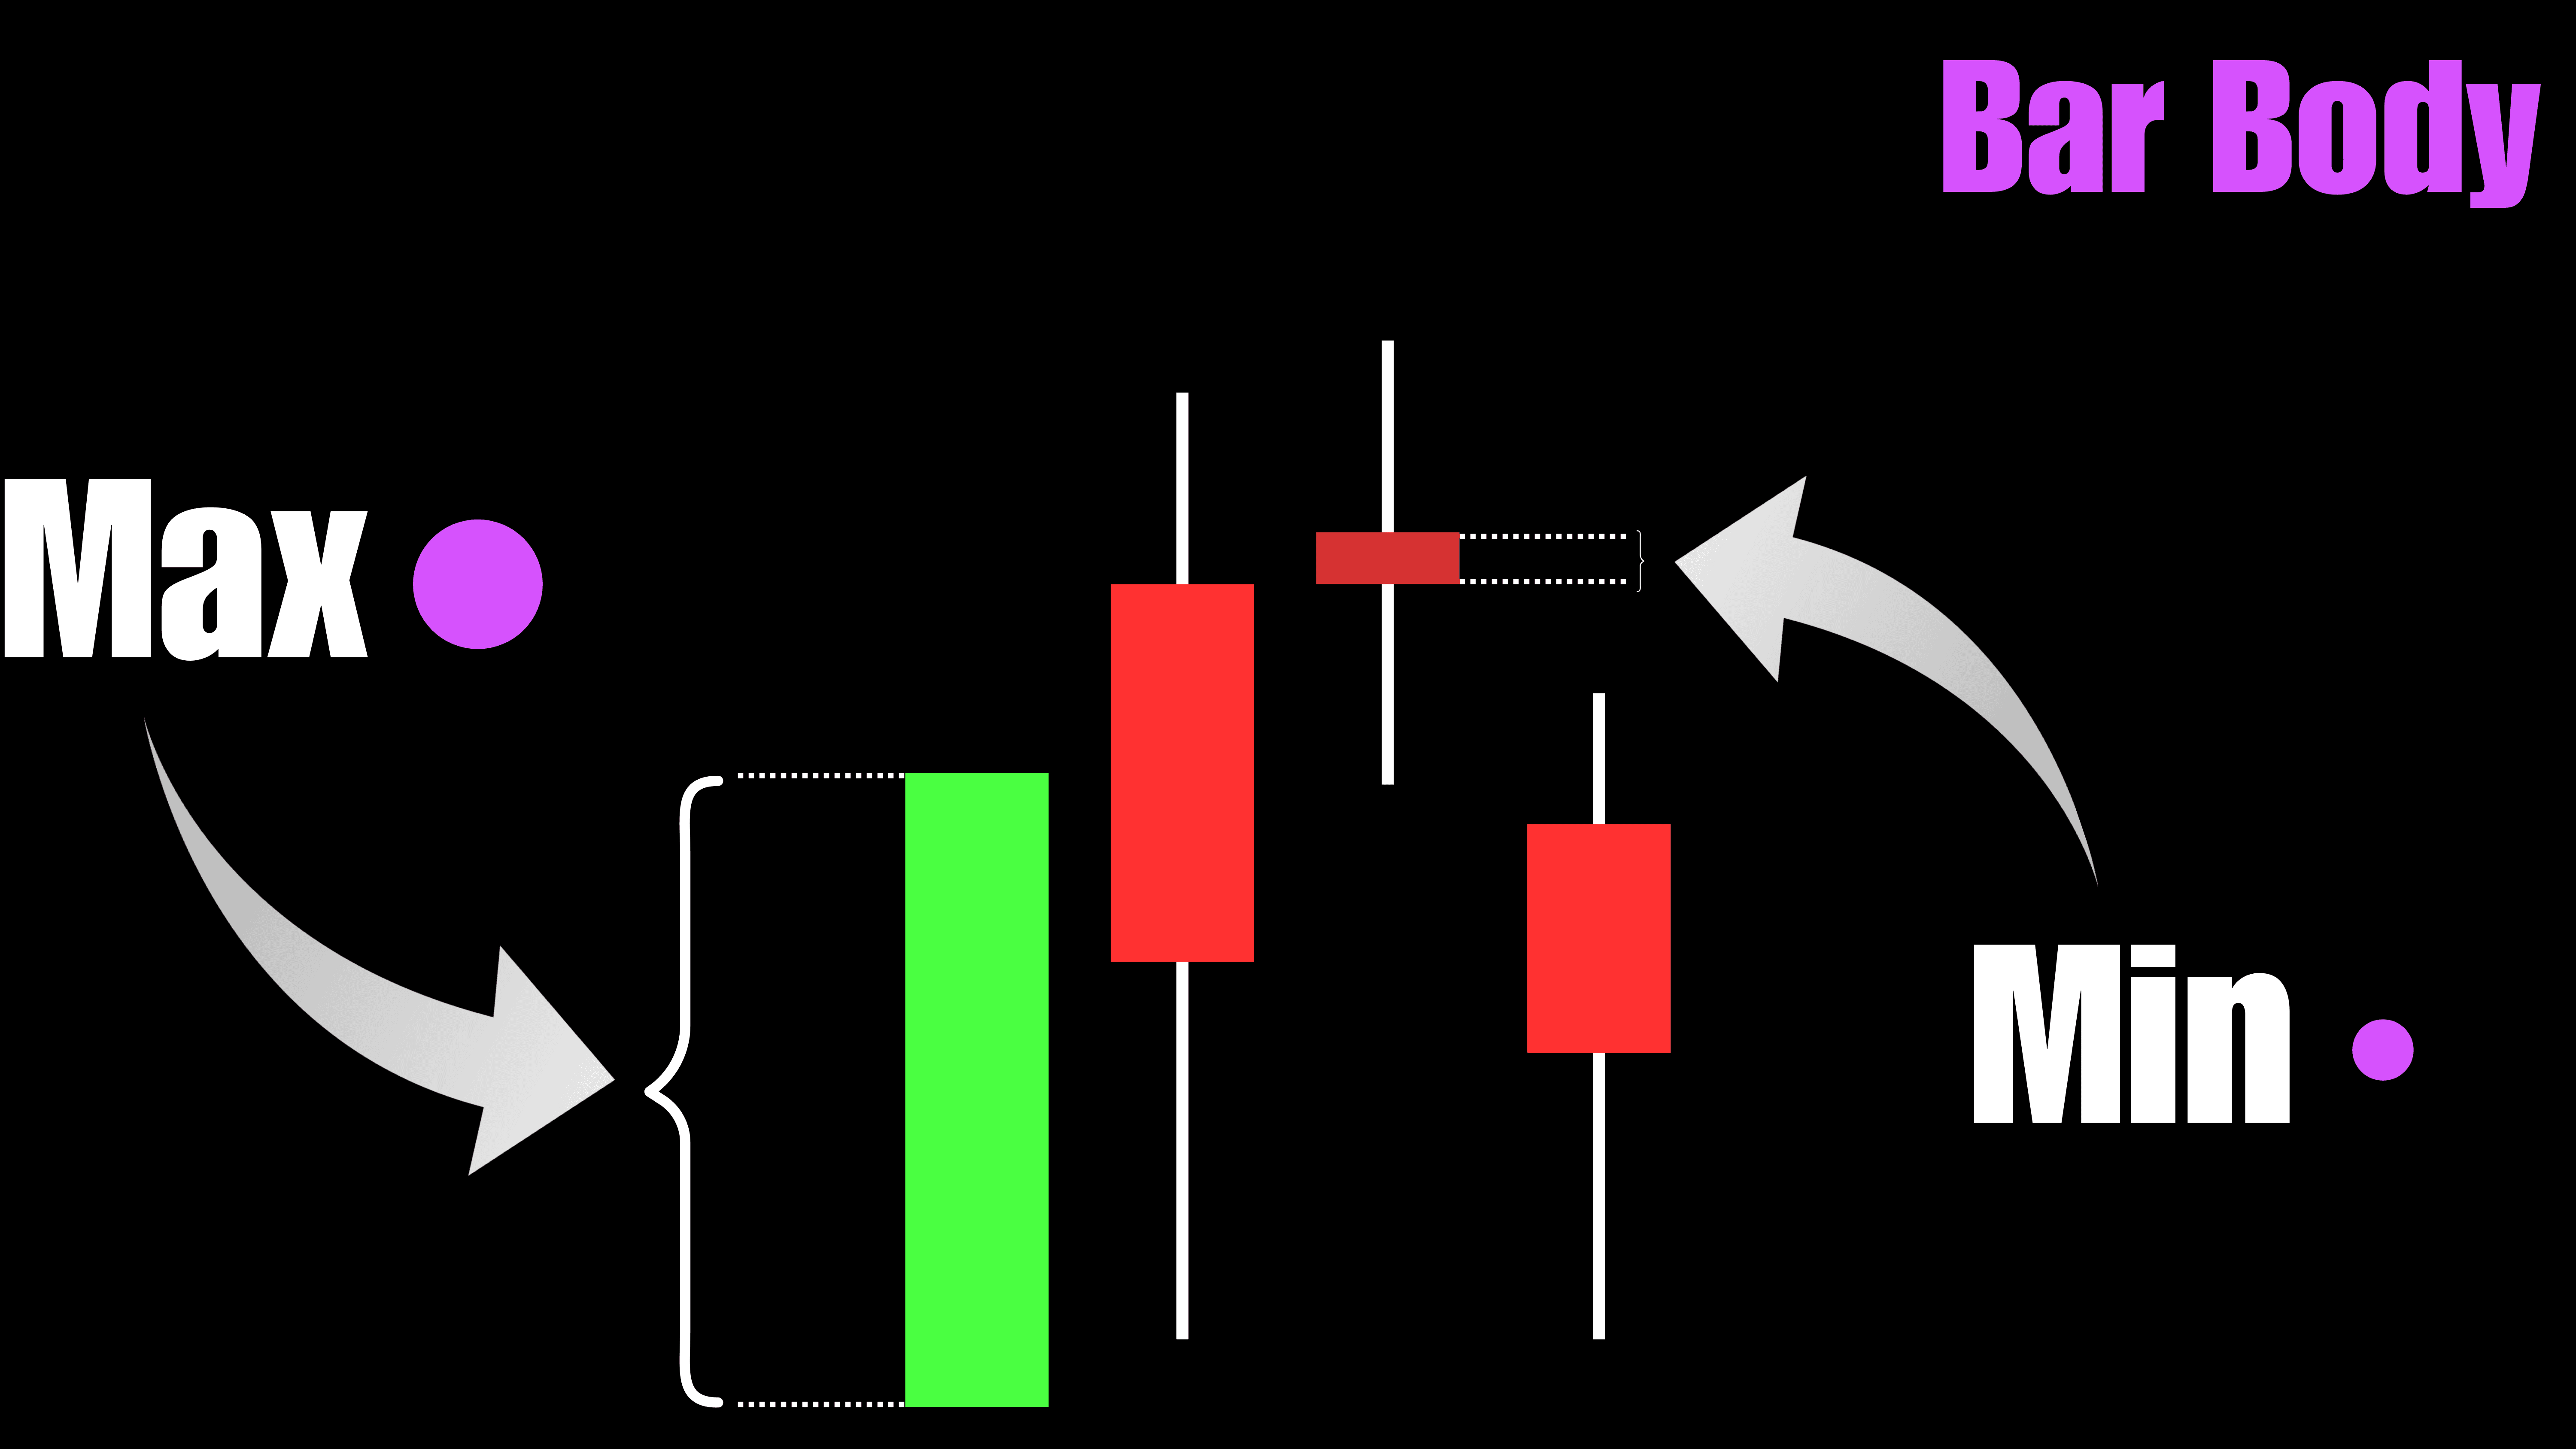
The candle body (Open–Close distance) represents directional conviction – how far the price moved during its active phase.
- Largest body: Reflects decisive directional strength, often linked with impulse moves or breakout bars.
- Smallest body: Indicates hesitation or balance between buyers and sellers.
How to apply:
- Large bodies help identify impulse bars – early signs of momentum expansion.
- Small bodies mark pause zones, often appearing before volatility returns.
- Comparing body sizes across a series helps gauge trend energy: shrinking bodies = weakening drive; expanding bodies = strengthening direction.
3. Candle Spread (High–Low Distance)
A candle’s full range (High–Low) shows the level of price volatility within that bar.
- Largest range: Marks strong volatility or expansion.
- Smallest range: Marks compression or reduced volatility.
How to apply:
- A sudden range expansion after compression often precedes breakouts or reversals.
- Extremely small ranges indicate volatility contraction, a common pre-breakout condition.
- Recognizing these shifts helps traders prepare for volatility-based setups.

4. Total Volume Extremes
Volume measures how much participation occurred during a candle’s lifetime.
- Max volume: Shows where most activity and capital flow occurred – usually around breakouts, climaxes, or strong supply/demand zones.
- Min volume: Marks quiet zones or low-liquidity periods, often during sideways markets or pre-news waiting phases.
How to apply:
- Use volume extremes to locate zones of significant activity, where large trades are likely executed.
- Avoid low-volume phases where the market lacks commitment and follow-through.
.png)
5. Buy Volume Extremes
Buy volume represents the aggressive activity of buyers hitting the ask.
- Max buy volume: Strong buying pressure, possibly a real breakout or short-covering move.
- Min buy volume: Wak demand, potential start of a bearish move.
How to apply:
- Confirm whether a price rise is supported by genuine order flow.
- Help distinguish true breakouts (price + buy volume alignment) from false pushes driven by thin liquidity.
.png)
6. Sell Volume Extremes
Sell volume represents the aggressive activity of sellers hitting the bid.
- Max sell volume: Aggressive selling or panic phases.
- Min sell volume: Lack of selling strength, often near short-term bottoms.
How to apply:
- Spikes in sell volume can mark distribution tops or panic lows.
- If price keeps dropping but sell volume weakens, it may hint at a loss of bearish strength or buying absorption.
.png)
7. Positive Delta Extremes
A positive delta means buying pressure exceeds selling pressure. (Delta = Buy Volume − Sell Volume)
- Max positive delta: Strong buying dominance – real demand and possible short squeeze.
- Min positive delta: Weak buyer participation – limited upside energy.
How to apply:
- Confirm the authenticity of bullish momentum.
- Use a large positive delta to verify that an uptrend is supported by actual order flow, not just thin price movement.
.png)
8. Negative Delta Extremes
A negative delta means selling pressure dominates.
- Max negative delta: Heavy selling pressure, often in liquidation or capitulation zones.
- Min negative delta: Selling exhaustion – potential for a short-term rebound or absorption.
How to apply:
- Identify panic-sell zones or potential capitulation endings.
- Detect absorption, where delta turns heavily negative but price stabilizes – suggesting large buyers are quietly accumulating.
.png)
How OmniSpectrum Scan supports your trading decisions
OmniSpectrum Scan isn’t a signal generator – it’s a market microscope. It helps you read the story behind each bar so you can:
- See where real momentum starts and where it fades
- Detect breakout and absorption behavior early
- Identify which side (buyers or sellers) truly controls a move
- Avoid low-volume, indecisive periods
- Refine your entries by waiting for confirmed strength or weakness
By scanning every candle property in real time, the indicator turns raw price data into actionable context, so you can make more confident trading decisions based on how it behaves beneath the surface.
Curious what experienced traders actually run? Check the best NinjaTrader 8 indicators ranked by purchases.




_1787026707358.svg)